I'm excited to announce that I will be offering two camps this summer geared towards preschoolers. I realize there's not a lot for children in this age group to do in the summer in terms of structured activities. The former Montessori teacher in me is having SO much fun getting these camps planned. Here's the details:
Crawly Critters Camp will be held June 3-6 from 10-11:30 a.m. We will learn about a different insect each day. We will have storytime, music time, craft time, snack time, and play time. All activities will be related to our "buggy" theme. Cost is $60 and includes all materials.
Fun at the Beach Camp will be held June 10-13 from 10-11:30 a.m. We'll learn all about ocean creatures and have fun each day listening to stories, singing songs, doing fingerplays, making crafts, eating fun snacks, and playing with our new friends. Cost is $60 and includes all materials.
If you enroll more than one child or enroll one child in more than one camp, please take $5 off your tuition for each camp or camper.

Walnut Hill Studio offers group enrichment classes for children and private piano instruction. At Walnut Hill Studio, your child can SING, DANCE, PLAY and CREATE. That's what we're all about!!
Friday, May 17, 2013
May Art Club Projects
This month's art club projects turned out SO well!! Every month during art club I kind of rave about how much I love what the kids create.......so much so that the kids think it's funny! This month was no exception. I love it when I can send them home with artwork that is worthy of hanging on the wall!
We ambitiously tackled three projects: mandalas, peacock paintings, and mixed-media bird nests. You can click on the links in the previous sentence to see the posts that inspired these projects. I also had the peacock canvas project pinned on Pinterest, but the link was just to a Facebook page, so I don't have a source link for it.
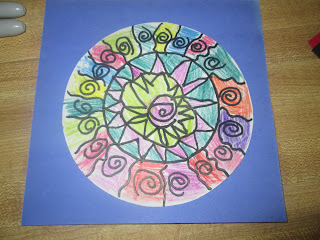
We briefly discussed mandalas and radial symmetry. We approached the mandala project in two ways. They could either trace a peanut butter jar lid to make an inner circle and then create patterns OR we folded a pre-cut circle into eighths and they drew a repeating pattern in each "pie" section. As you can see from the photos of the finished projects, not everyone totally grasped the concept of radial symmetry, but they still had some really great pieces of artwork and enjoyed the process. We used pencils to draw our initial designs, then traced the pencil lines with black Sharpies. Color was added using watercolor pencils, and some children then painted their colored areas with water to blend the pencil coloring and others chose to not use the water. When finished, we matted the mandalas onto a colored background square. See finished mandalas below. As usual, I did not get photos of each child's project. We are SO busy making art that it's hard to stop and actually take a photo of it!!


For the mixed-media bird nests, the first step was mixing blue and white tempera paint to create a background color. Once they mixed the paint, each child painted a 6 inch square of heavy cardboard and let it dry. These dried pretty quickly. After their background square was dry, they used paper bags, yarn, glue, construction paper, and cardstock to make their nest, leaves and eggs. I really love how these turned out. I love projects that incorporate many different materials. See some of our finished nests below.


At the beginning of our work time, I called each child over and painted their hands blue to start the "body" of their peacocks. They then worked on other projects while their handprints dried. I had a table set up with a few colors of acrylic paint and some unsharpened pencils. They used the pencils to make spots of color on their peacocks. I also had a bunch of Sharpie markers in fine and ultra-fine tips. They used these to make the feathers and details on their peacocks. I had also printed out several close-up photos of real peacocks so they had a frame of reference for their work. I love how these turned out!!!! See finished work below.


In addition to our planned projects, at each art club I give the children two art journal prompts which are printed on address labels. They can take a label and stick it onto a page in their journals. I have a variety of art supplies that they can then use to create art based on their inspiration work. I so wish I had taken more photos of their work in their art journals. They amaze me each time with their innovation with materials and their creativity. This month's journal prompts were "shine" and "steamy". Prior to work time we usually brainstorm a variety of options for our journal words so they can think outside the box. For example, this week in journals the children drew the following to represent "steamy": a cup of hot cocoa with steam rising out, a kitchen with a steaming pot on the stove, a pot of boiling water with steam rising from it, etc. I did photograph two representations of "shine". These represent some of my youngest and oldest children's work. It goes to show how open-ended art can be and how accessible it is to all ages of children. I love how the older child used tissue paper to create her sun.


Finally, I wanted to share a few photos of the children just working so you can see how busy and happy they are during art club. If they finish all their projects and have extra time, they love sitting on the rug with lap desks and creating in their journals. I make a bunch of supplies available to them, and they just go at it! I think they could hang out in the studio for hours just creating!! If you are curious, this semester I've had 13 children in art club (this includes my own two sons). My mom is my assistant, and we each oversee one project each time. I have stations set up for any other projects that are available that week. The children range in age from preschool through fifth grade. We have a blast!!


We ambitiously tackled three projects: mandalas, peacock paintings, and mixed-media bird nests. You can click on the links in the previous sentence to see the posts that inspired these projects. I also had the peacock canvas project pinned on Pinterest, but the link was just to a Facebook page, so I don't have a source link for it.
We briefly discussed mandalas and radial symmetry. We approached the mandala project in two ways. They could either trace a peanut butter jar lid to make an inner circle and then create patterns OR we folded a pre-cut circle into eighths and they drew a repeating pattern in each "pie" section. As you can see from the photos of the finished projects, not everyone totally grasped the concept of radial symmetry, but they still had some really great pieces of artwork and enjoyed the process. We used pencils to draw our initial designs, then traced the pencil lines with black Sharpies. Color was added using watercolor pencils, and some children then painted their colored areas with water to blend the pencil coloring and others chose to not use the water. When finished, we matted the mandalas onto a colored background square. See finished mandalas below. As usual, I did not get photos of each child's project. We are SO busy making art that it's hard to stop and actually take a photo of it!!


For the mixed-media bird nests, the first step was mixing blue and white tempera paint to create a background color. Once they mixed the paint, each child painted a 6 inch square of heavy cardboard and let it dry. These dried pretty quickly. After their background square was dry, they used paper bags, yarn, glue, construction paper, and cardstock to make their nest, leaves and eggs. I really love how these turned out. I love projects that incorporate many different materials. See some of our finished nests below.


At the beginning of our work time, I called each child over and painted their hands blue to start the "body" of their peacocks. They then worked on other projects while their handprints dried. I had a table set up with a few colors of acrylic paint and some unsharpened pencils. They used the pencils to make spots of color on their peacocks. I also had a bunch of Sharpie markers in fine and ultra-fine tips. They used these to make the feathers and details on their peacocks. I had also printed out several close-up photos of real peacocks so they had a frame of reference for their work. I love how these turned out!!!! See finished work below.


In addition to our planned projects, at each art club I give the children two art journal prompts which are printed on address labels. They can take a label and stick it onto a page in their journals. I have a variety of art supplies that they can then use to create art based on their inspiration work. I so wish I had taken more photos of their work in their art journals. They amaze me each time with their innovation with materials and their creativity. This month's journal prompts were "shine" and "steamy". Prior to work time we usually brainstorm a variety of options for our journal words so they can think outside the box. For example, this week in journals the children drew the following to represent "steamy": a cup of hot cocoa with steam rising out, a kitchen with a steaming pot on the stove, a pot of boiling water with steam rising from it, etc. I did photograph two representations of "shine". These represent some of my youngest and oldest children's work. It goes to show how open-ended art can be and how accessible it is to all ages of children. I love how the older child used tissue paper to create her sun.


Finally, I wanted to share a few photos of the children just working so you can see how busy and happy they are during art club. If they finish all their projects and have extra time, they love sitting on the rug with lap desks and creating in their journals. I make a bunch of supplies available to them, and they just go at it! I think they could hang out in the studio for hours just creating!! If you are curious, this semester I've had 13 children in art club (this includes my own two sons). My mom is my assistant, and we each oversee one project each time. I have stations set up for any other projects that are available that week. The children range in age from preschool through fifth grade. We have a blast!!


Thursday, May 16, 2013
May Sewing Club Projects: Mother's Day Gifts
This month I had both the Beginner and Advanced Sewing Clubs make the same project. We also just made one project instead of two. They rarely have time to finish two projects at sewing club, and I wanted them to be able to have time to wrap their gift and make a handmade card to go with it. Even with only one project, both our sewing clubs ran late this month. I think it was worth it, however, because I've heard from a few moms that they really loved the gifts.
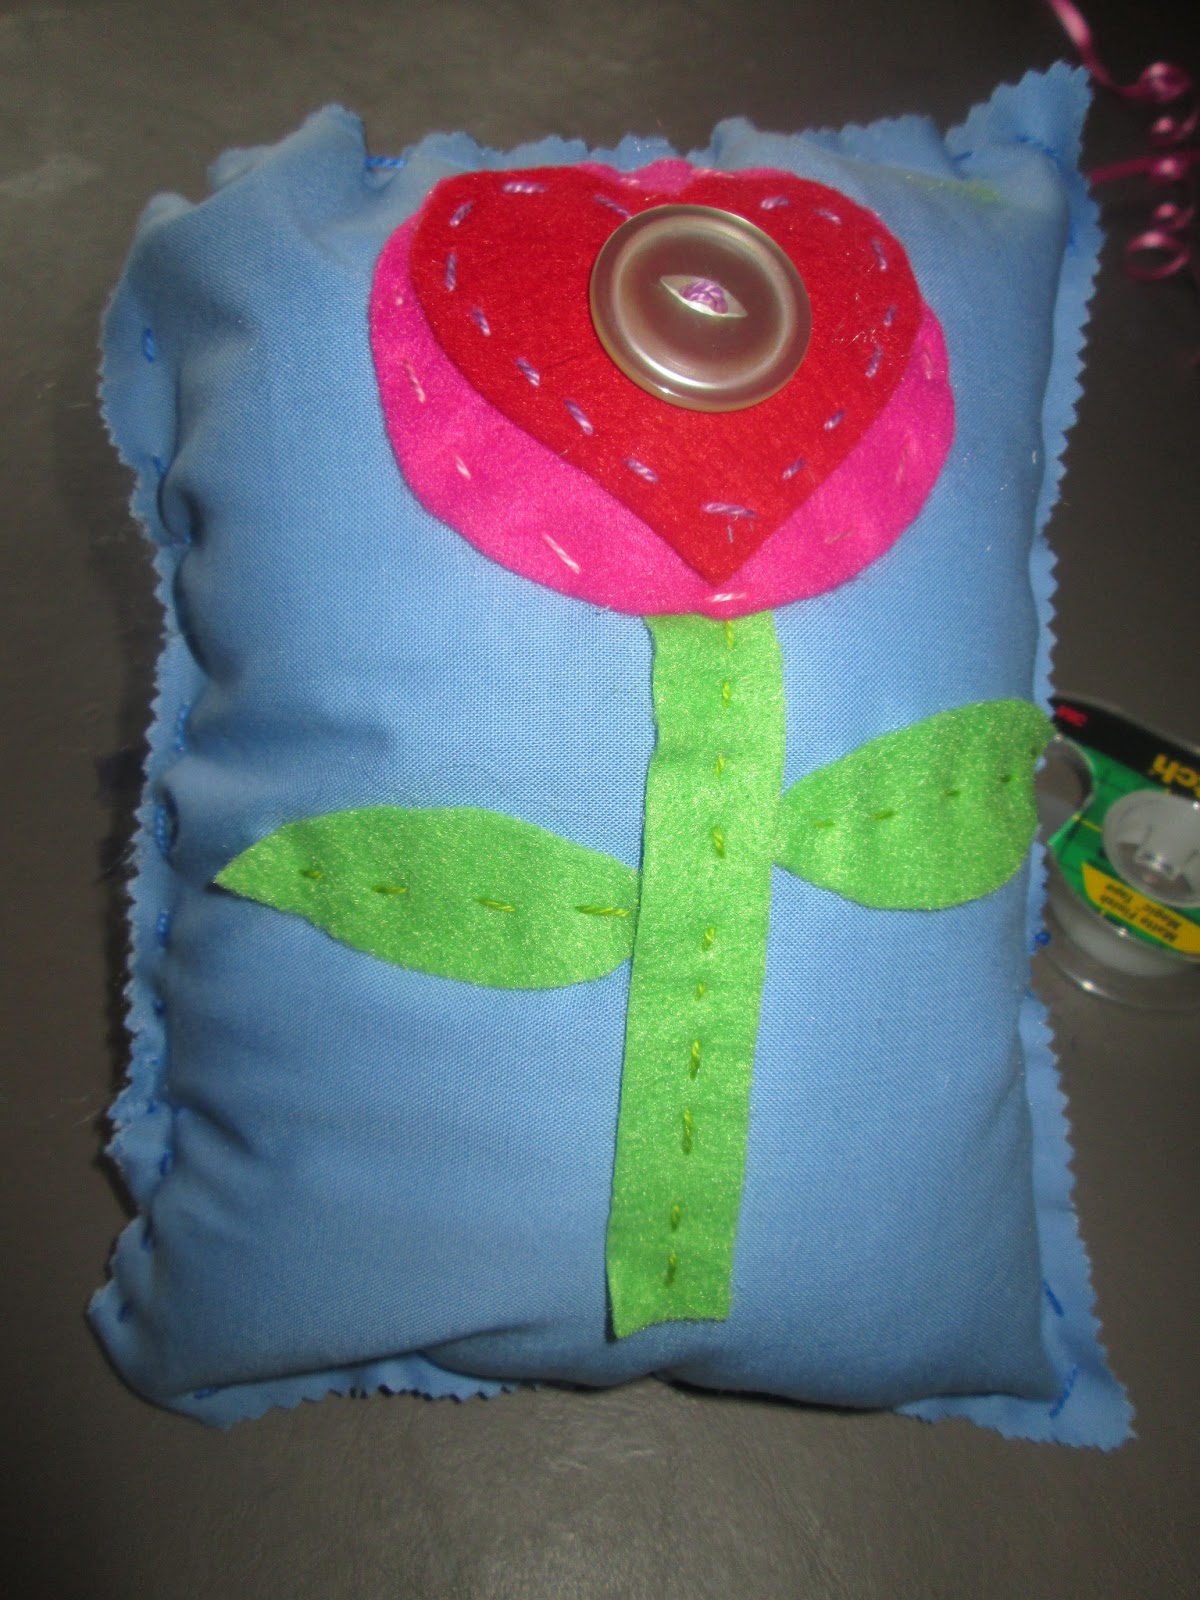
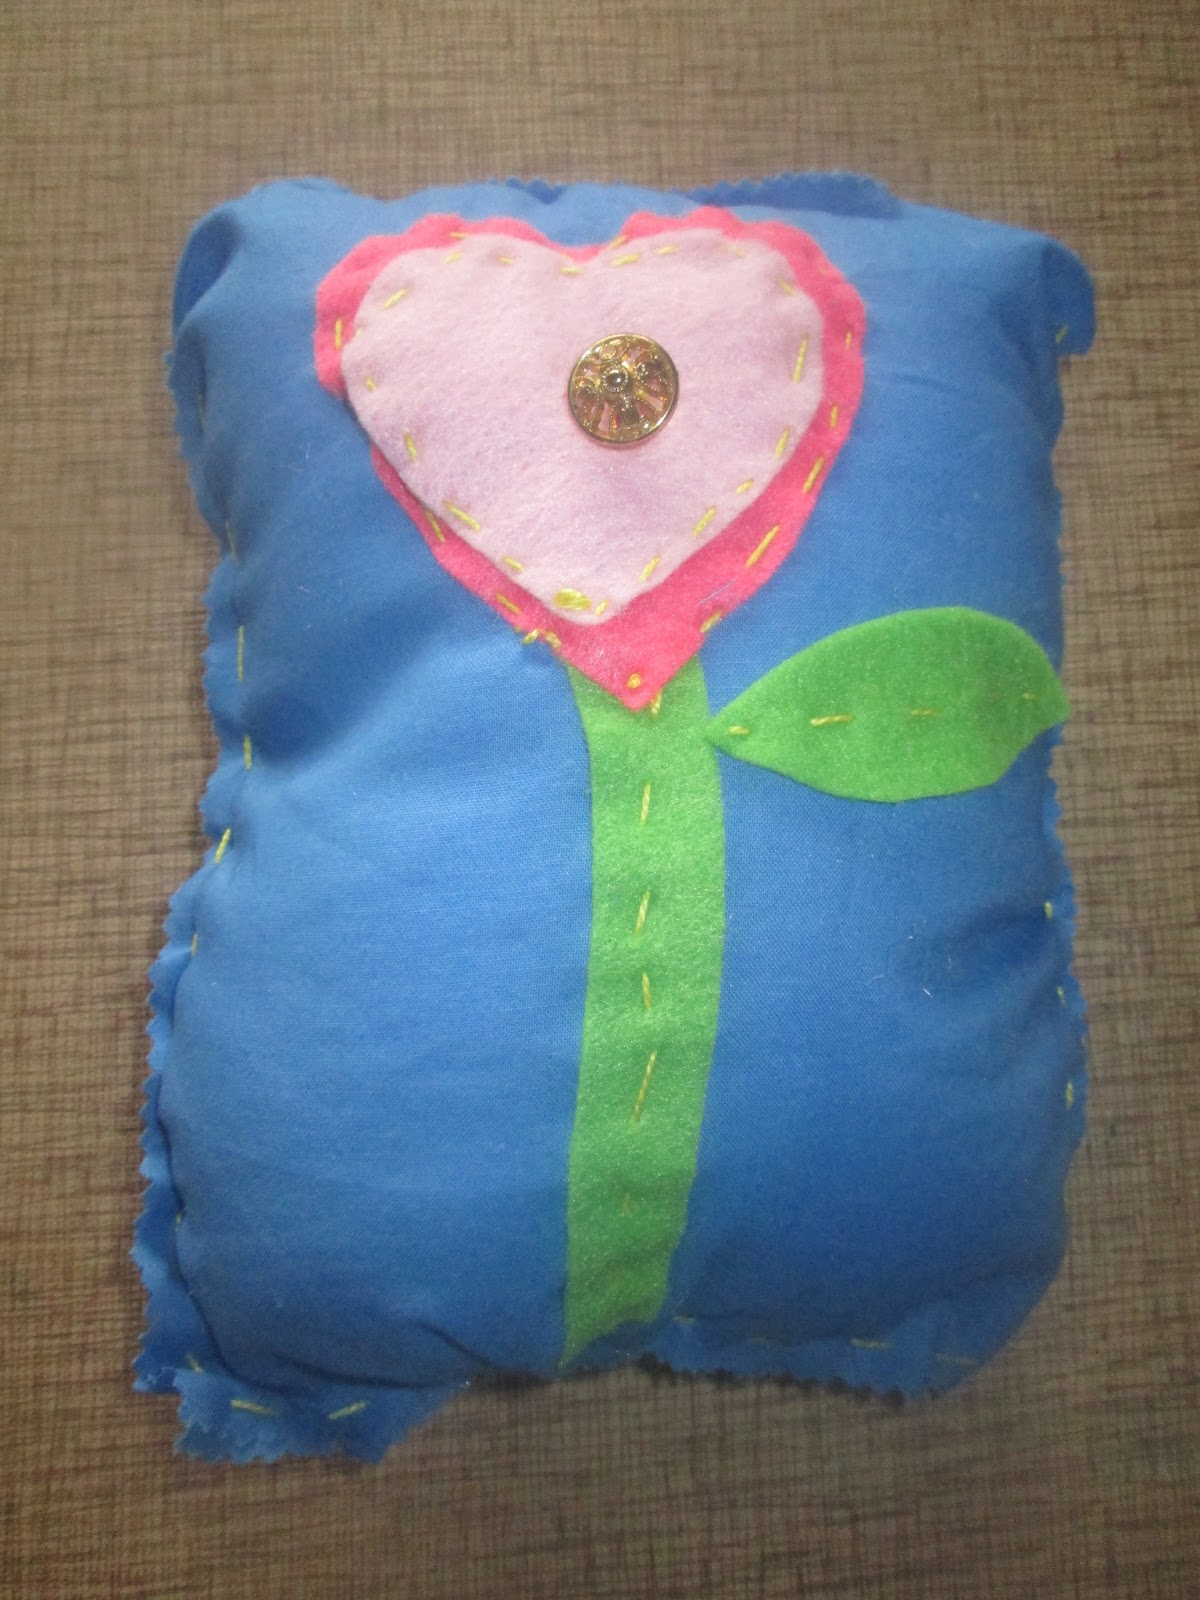
To prep for the project, I cut circles (two sizes), hearts (two sizes) and stems and leaves from craft felt. The kids were able to then pick which combo of colors and shapes they wanted to use for their flower. They sewed the flower together first, with a button in the center. Then they sewed the stem and leaves onto the background fabric (blue cotton). Next, they sewed their flower onto the background fabric, overlapping it a bit with the stem. The final step was to sew the two "pillow pieces" together and stuff it. Then we wrapped their gifts in tissue paper and tied them with curling ribbon. They each made a special card to attach to the gift. I thought their pillows turned out SO cute. I tried to get photos of all of them, but I may have missed a few here and there. Scroll down to see all the finished pillows from both groups.


.JPG)
.JPG)
.JPG)
.JPG)

.JPG)
.JPG)
Wednesday, April 24, 2013
April Art Club Projects
I have felt badly that I seem to get lots of photos of our Sewing Club projects and hardly any of our Art Club projects. Today I made a concerted effort to take as many photos of our projects as possible. So glad I did too, because (as usual) the kids' artwork was AWESOME!!
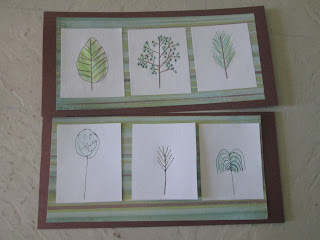
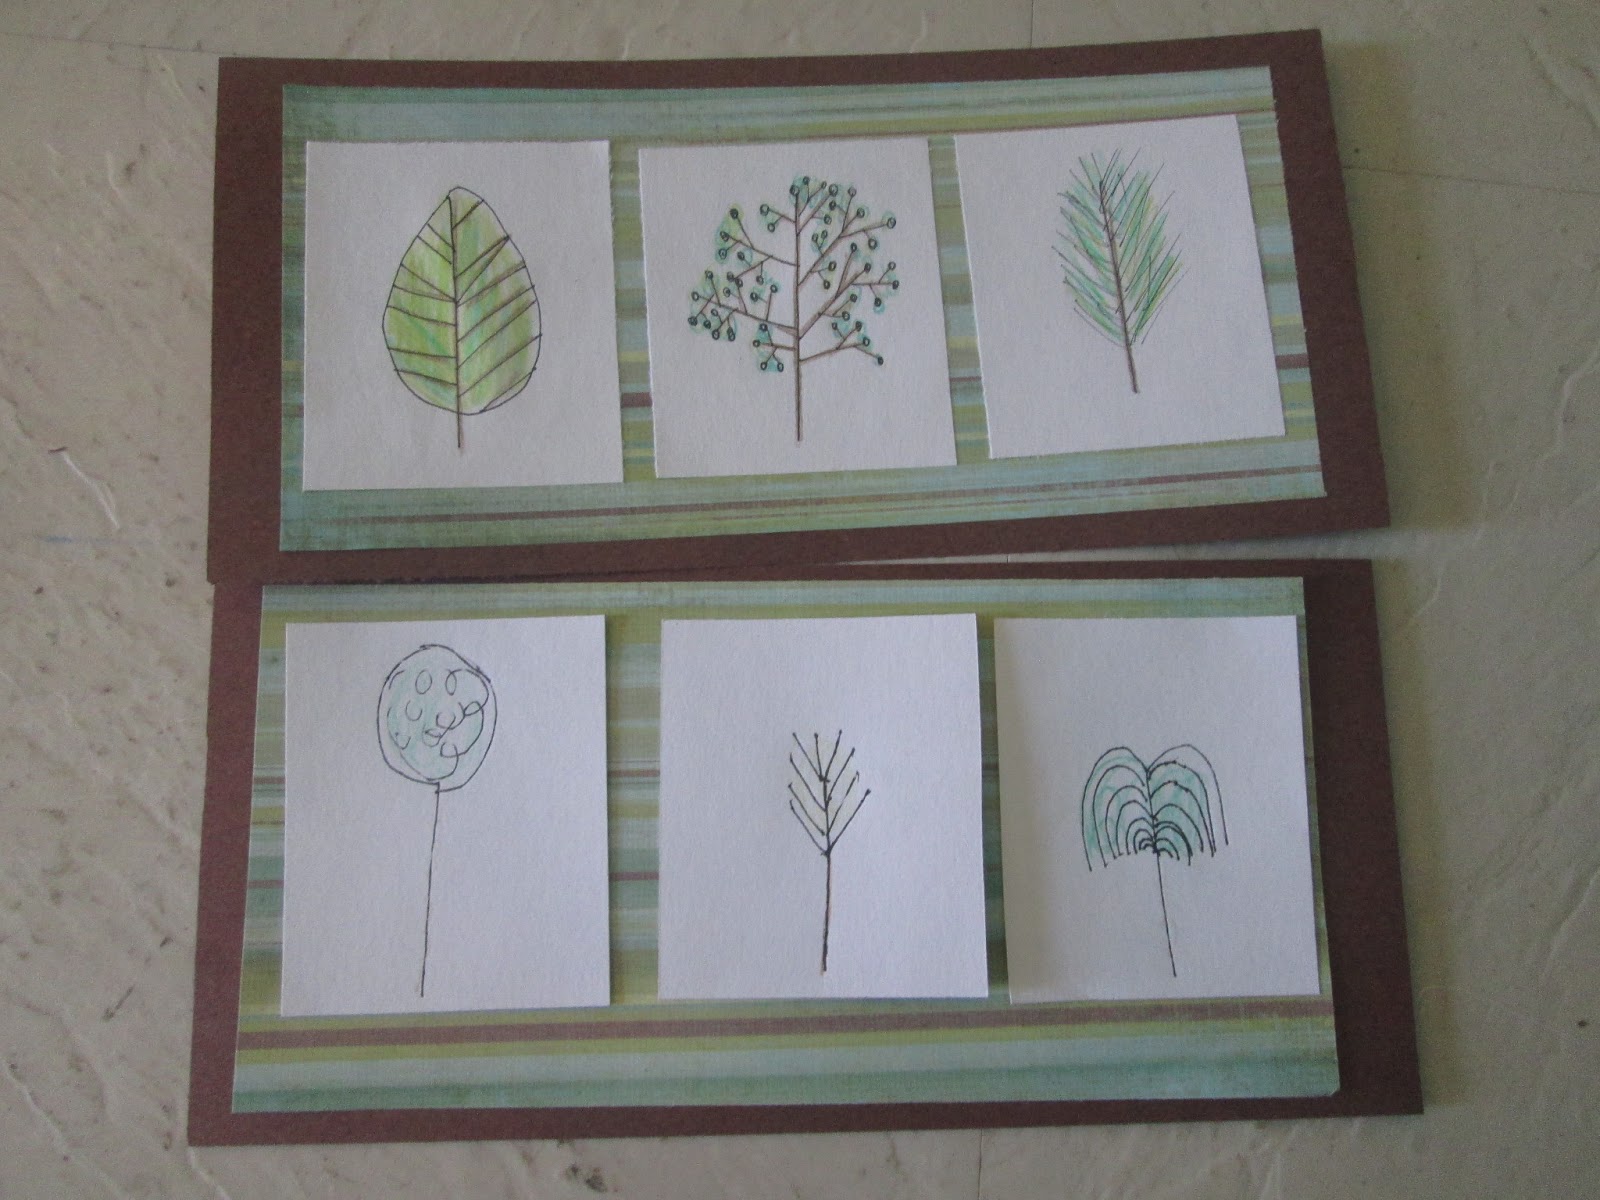
Perhaps my favorite project of the day was our "Tree Triptych" project. Maybe I loved it so much because I came up with the idea!! First of all, I talked to the kids about what a triptych is in art. SEE HERE to read more about this yourself. Quite a while back I had pinned this graphic (scroll down to see the tree graphic) with a variety of different trees, thinking I could use it somehow someday. I taped a copy of the graphic to the wall above the work station. The kids then drew three different trees on each of three white rectangles using a fine-tipped black permanent marker. They then added details with green and brown colored pencils. Then they glued the three trees onto a piece of green scrapbook paper and glued that onto a piece of brown construction paper. I love how these turned out!!


One project we did was "Plants in a Jar" inspired by THIS POST at Art Projects for Kids. I thought the kids did a great job, and their jars turned out great. Each one was unique; some had flowers, some vegetables; there were some with bugs and even worms in the dirt. Here are some photos of the finished paintings that I was photograph.


One of today's projects was "Rizzi Birds" inspired by THIS POST at Deep Space Sparkle. I also found this variation of the project at Holly's Art Corner and loved that it would make a perfect gift for Mother's Day with a mama and baby bird. Before we started our work, I told the kiddos a bit about James Rizzi and his art. We looked at the following two photos of some of his super-cool projects. HERE is the source for the two photos below.


Following are photos of our Rizzi birds. I LOVE THEM SO MUCH!!


Perhaps my favorite project of the day was our "Tree Triptych" project. Maybe I loved it so much because I came up with the idea!! First of all, I talked to the kids about what a triptych is in art. SEE HERE to read more about this yourself. Quite a while back I had pinned this graphic (scroll down to see the tree graphic) with a variety of different trees, thinking I could use it somehow someday. I taped a copy of the graphic to the wall above the work station. The kids then drew three different trees on each of three white rectangles using a fine-tipped black permanent marker. They then added details with green and brown colored pencils. Then they glued the three trees onto a piece of green scrapbook paper and glued that onto a piece of brown construction paper. I love how these turned out!!


One project we did was "Plants in a Jar" inspired by THIS POST at Art Projects for Kids. I thought the kids did a great job, and their jars turned out great. Each one was unique; some had flowers, some vegetables; there were some with bugs and even worms in the dirt. Here are some photos of the finished paintings that I was photograph.


One of today's projects was "Rizzi Birds" inspired by THIS POST at Deep Space Sparkle. I also found this variation of the project at Holly's Art Corner and loved that it would make a perfect gift for Mother's Day with a mama and baby bird. Before we started our work, I told the kiddos a bit about James Rizzi and his art. We looked at the following two photos of some of his super-cool projects. HERE is the source for the two photos below.
Following are photos of our Rizzi birds. I LOVE THEM SO MUCH!!


Subscribe to:
Posts (Atom)